Cette page sera traduite
en Français bientot!
Making a bag
This is usually not a pipe-maker's favorite task but with a little patience, making a bag is a very straight forward procedure. I use 3.5 to 4.5 oz chrome-tanned cow hide that has passed "the test". I test for airtightness by holding the leather to my lips and sucking air in enthousiastically. If no air seeps through then it is probably adequate for bagpipes.
|
|
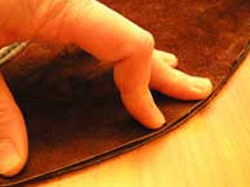
Roughing the Inside
In preparation for gluing, I first rough up a half inch area on the smooth/shiny side of the leather with coarse sandpaper so that glue will penetrate and make for a stronger hold. Make sure to roughen the upper half of the bag too. |
|
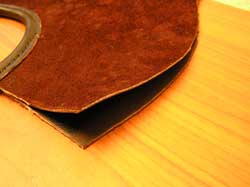
Gluing the Two Halves
Apply glue to the roughened areas and join the upper half to the lower half. Apply plenty of pressure. Some folks like to use a hammer at this stage to tap along the seam and remove any air pockets. It also spreads the glue in better. |
|
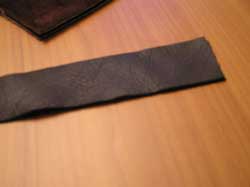
Outer Strip
A strip is cut about 1.25 inches wide and long enough to run along the full length of the seam. |
|
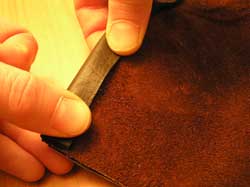
Folding Over
The strip is then folded over the seam after glue has been applied to the inner suede side. I also apply glue to the outside of the bag where the strip will be. Be careful when applying glue at this stage because it can easily squeeze out onto the bag's exterior and look shoddy. |
|
Glued seam
The strip is glued and now ready to accept the holes. |
|
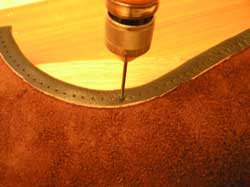
Spacer Tool
This tool evenly spaces out the position of each hole to create a uniform stitch. I use a wheel that sets 6 holes per inch. |
|
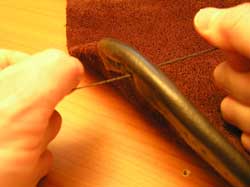
Awl
The awl is used to pierce a hole thru all 5 layers of leather. I find this step to be the most challenging because getting the awl to exit in a perfectly straight line is not always executed successfully. |
|
Needles
I use 2 needles to sew what is known as a "saddle" stitch. The needles are joined by the same piece of waxed twine or artificial sinew. You will need a generous amount of twine to complete the seam. The stitching will be done in a figure 8 pattern. |
|
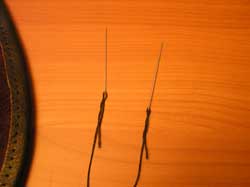
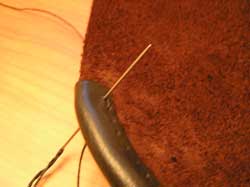
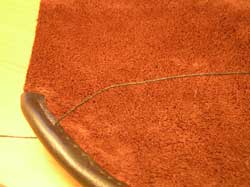
Step One
Find the second-to-last hole and put one of the needles thru it. Then pull the twine so that it is exactly half way in. Hold one needle in each hand and take a few steps back until the twine forms 2 straight lines. This is simply to check thet the twine is indeed centered in relation to the hole in the bag. |
|
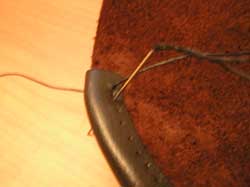
Step Two
Put one of the needles through the very last hole and pull the twine all the way. |
|
Step Three
Insert the 2nd needle thru the very same hole in from the other side and pull the twine all the way in. |
|
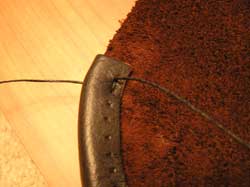
Tighten the Loop
Pull the twine firmly on each side to make a tight first stitch. |
|
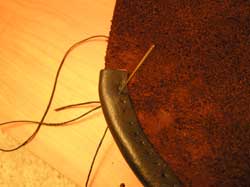
Step Four
Put one of the needles through the second-to-last hole once again. |
|
Step Five
Put the other needle thru the same hole in from the other side. |
|
Tighten the Loop
Pull the twine firmly on each side and tighten. Proceed to the next hole in a figure 8 pattern as follows: One needle thru the next hole, the second needle thru the same hole in from the other side and tighten. |
|
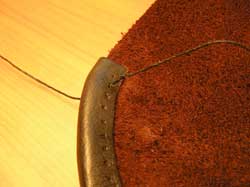
Time To Do Some Stitching!
|
|
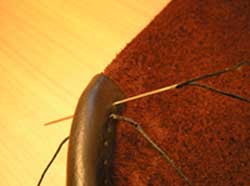
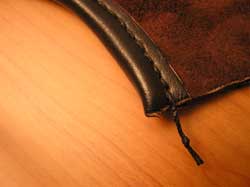
Final knot
Once you've reached the end just tie a double or triple knot firmly to prevent the stitches from loosening under pressure. Here you can see that I've left about an inch of twine in case I ever need to retighten things later. I don't think that this is necessary but I do it anyway. |
|
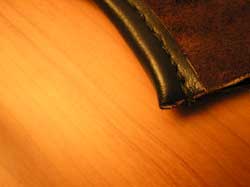
Cleaning up
To hide the excess twine I stuff it inside the bag and that's it. I hope this helps and good luck! |
|
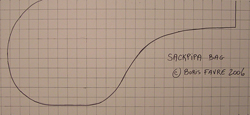
Sackpipa bag template
this pattern is my own bag design which can be downloaded by clicking on the image. Each square represents an inch when at full scale.
FYI, the pattern used in the above bag-making demo is based on Leif Eriksson's design.
|
 |